GKE forensics 1 - How to take a snapshot
After not finding a lot of sources in how to do forensics analysis on GKE nodes I have decided to make a guide for future me (and hopefully future you). The whole series should equip you with the knowledge to collect the virtual disk of a GKE node and analyze the data that contains this.
This guide only explains how to collect the filesystem. Moreover, you could collect the RAM of a virtual node if you have a strong suspicion that malware is running. But I may leave this to a later guide.
GKE Node snapshot collection
What is a GKE Node?
A GKE (Google Kubernetes Engine) node is the virtual machine in which k8s pods and docker containers will run when you create a Kubernetes cluster with the GCP Kubernetes managed service.
This node is bare-bones but is based on a Linux system, the most important details you will find in these systems are logs (journal) and the docker repositories and container metadata. This can be useful if a pod has been breached and illicit pods have been spun out as images and logs will appear.
Create Snapshot from GKE node
The first step is to create a snapshot for the GKE node (Which will appear as a VM instance). You need to go to Compute Engine > Storage > Snapshots
In this view, you need to go to CREATE SNAPSHOT
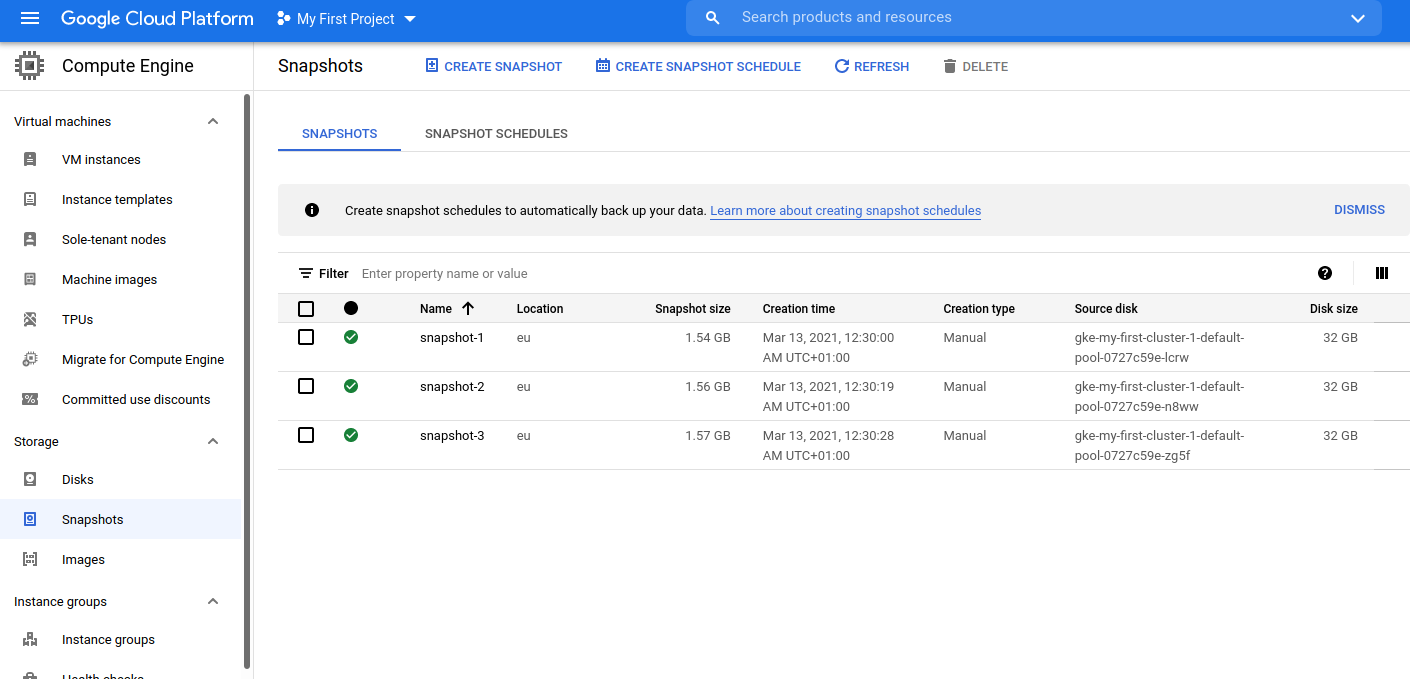
Once in CREATE SNAPSHOT you need to select the disk from a GKE virtual machine.

This process will create a snapshot, this can be used to create a new machine, but there is no way of extracting a snapshot from GCP directly.
Create Image from Snapshot
To be able to extract the information you will need to turn the snapshot into an image. Images can be used to create completely new virtual machines.
Moreover, Images can be exported. This is not the case with snapshots.
You need to go to the Compute Engine > Storage > Images
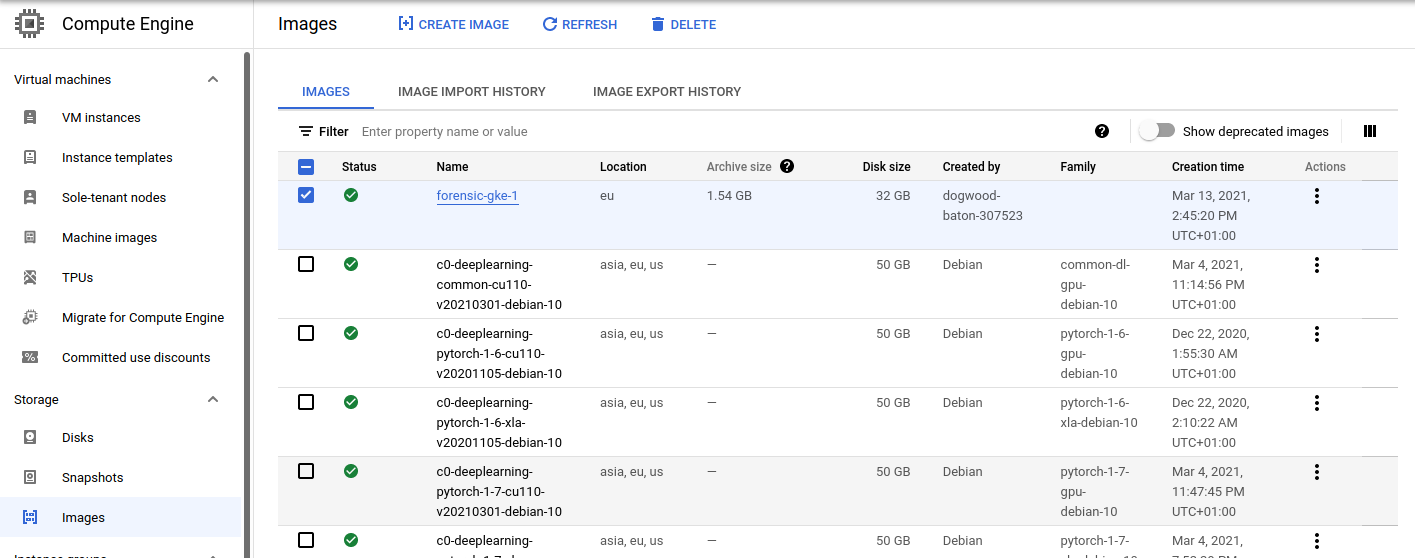
There you need to CREATE IMAGE
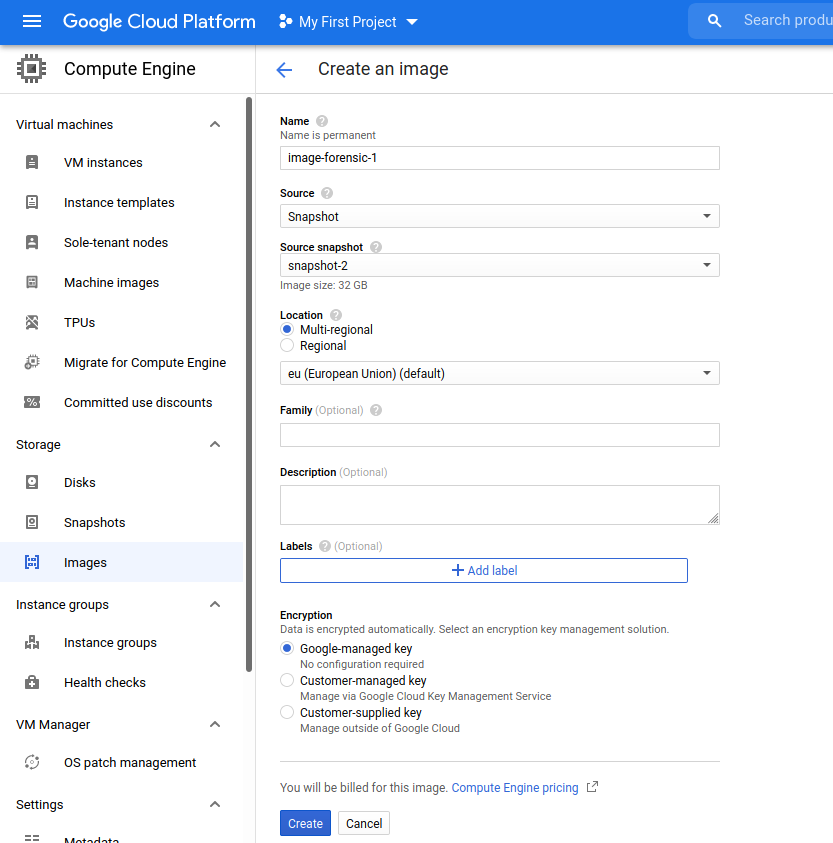
Give a clear name and use the source snapshot of the GKE node you want to analyze.
Once the image is complete, it will look like this.
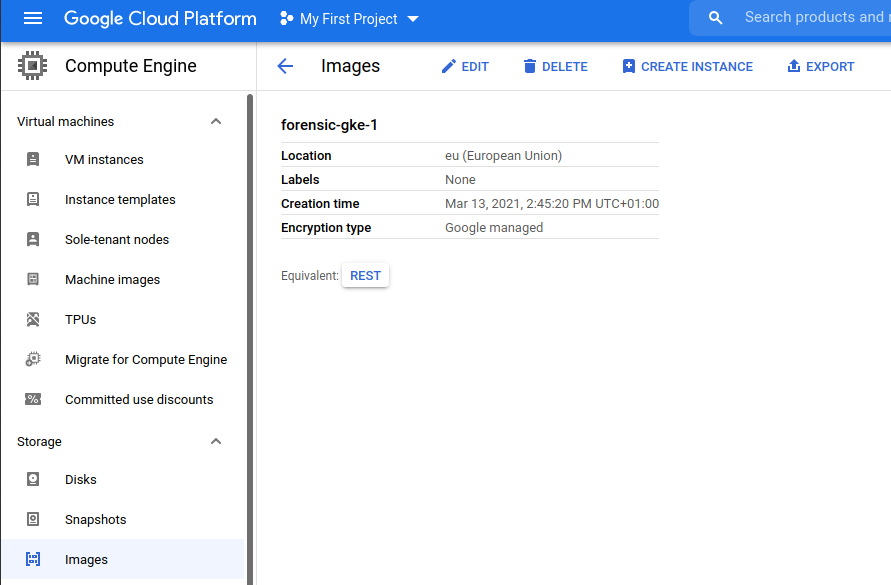
Take note of the EXPORT function, This will be used to move the image to a bucket. (If you have already a bucket to store the exported files you can skip the next chapter)
Create new Bucket
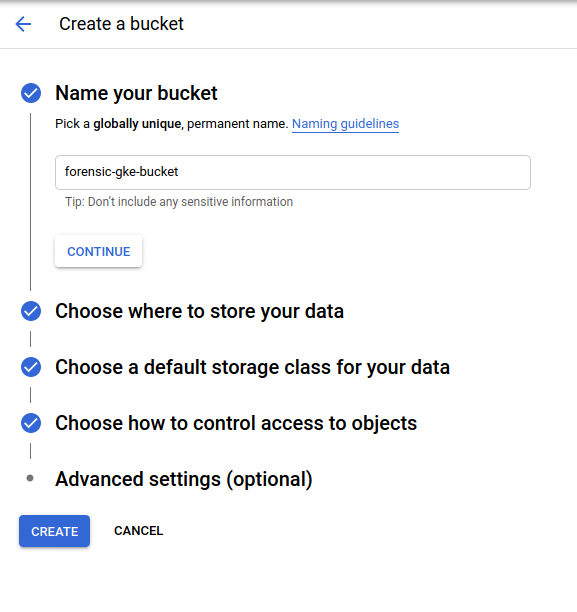
You still cannot download the image directly, you need to store it in a bucket. To create one you need to go to Storage > Browser

Here you can see CREATE BUCKET. Make sure it’s in the region closest to your operations and also it should only be accessible by the analysts that need access to the forensic images.
The images shouldn’t contain secrets but if the docker images are configured improperly. Proprietary information could be present.
Move Image to Bucket
The last step is to move the image to a bucket, so it can be imported.
Here you will see all the available buckets. Use the one created for the forensic analysis.
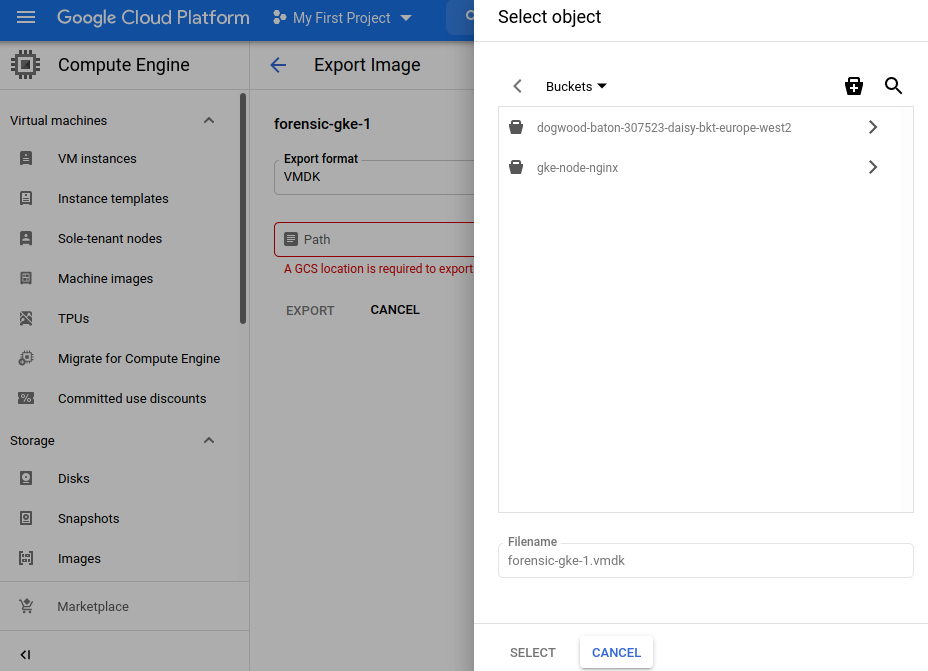
This process will take a while but after it’s completed you will find the file in your bucket.

From here you can download the file into your filesystem and initiate the investigation.
Conclusions
This process can be used for any virtual machine in GCP, not only GKE. Collecting a file that can be used for forensics is not a straightforward process but with this mini-guide, you should be able to do it without much problem.
I will see you in the next piece of this guide, in which we will learn to extract and mount the VMDK file.
GKE forensics 2 - How to Extract and Mount GKE VMDK files